
I’m becoming a dad. Well, technically I’m already a dad. But our first — a baby girl! — is due in September and this means changes for our home. It also presented a once-in-a-lifetime opportunity for me to binge 140+ episodes of an ancient history podcast. More on that later.
When I quit a job to work for myself, my wife and I knew we had having kids on our radar. I wanted to have more free time to work on projects like this, help with childcare, go to sports practices, and generally be around as a dad.
Most things I did in this project, I did for the first time. Which meant doing lots of research, asking handy friends, and giving myself a lot of time. I kept track of every receipt and will share that later in the Budget section. For now, the total project budget came to: $2,934.09 — not including the cost of my time.
Here’s a quick look at the before and after:

Before
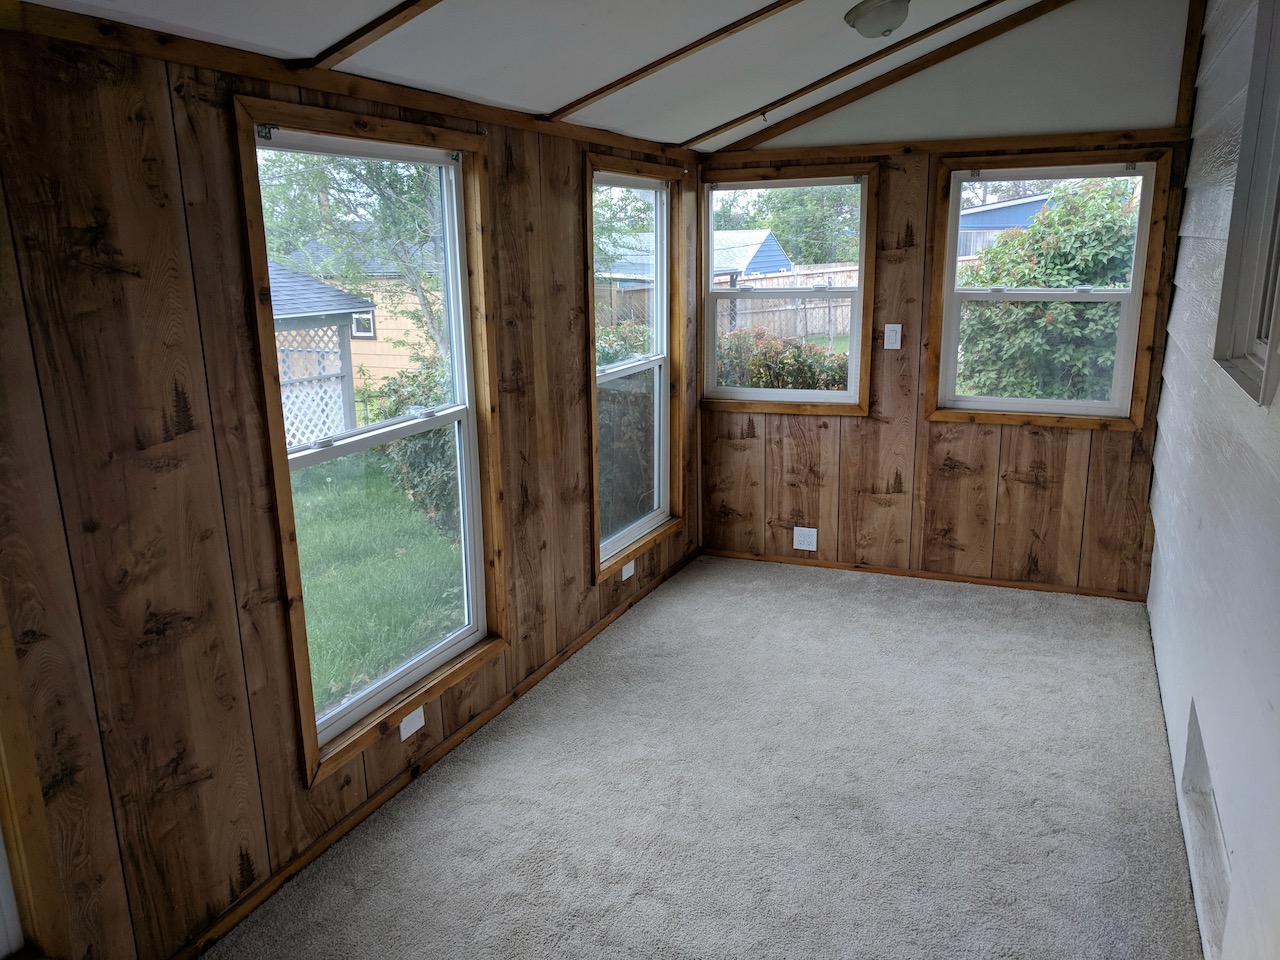
Our house is a typical Minimal Traditional post-war build. Many of these houses were built in Denver after World War II as the city grew from ~400,000 residents to over 1 million over the course of 25 years. There are many homes like it, but this one is ours.
There’s this a particularly ugly “man cave” extension built onto the back. I’m not sure when it was built. The worst/best feature is the animal prints. Zoom in to the picture above and see if you can find any pheasant or deer.
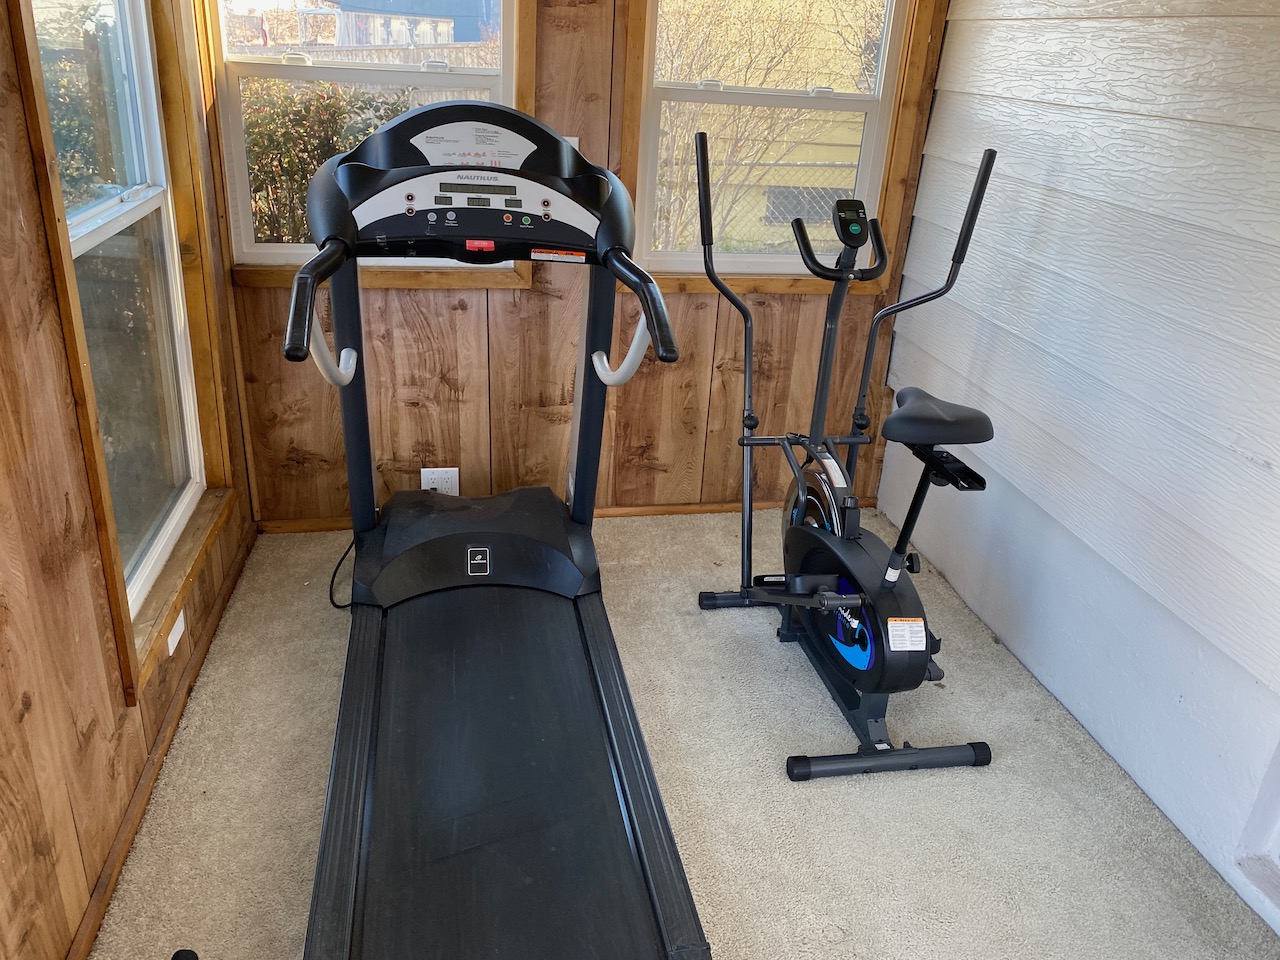
My current office is becoming a nursery. Which means that this gem of a space is meant to be my new office. Previously it had been functioning as an exercise space (since moved that to the basement).
Teardown
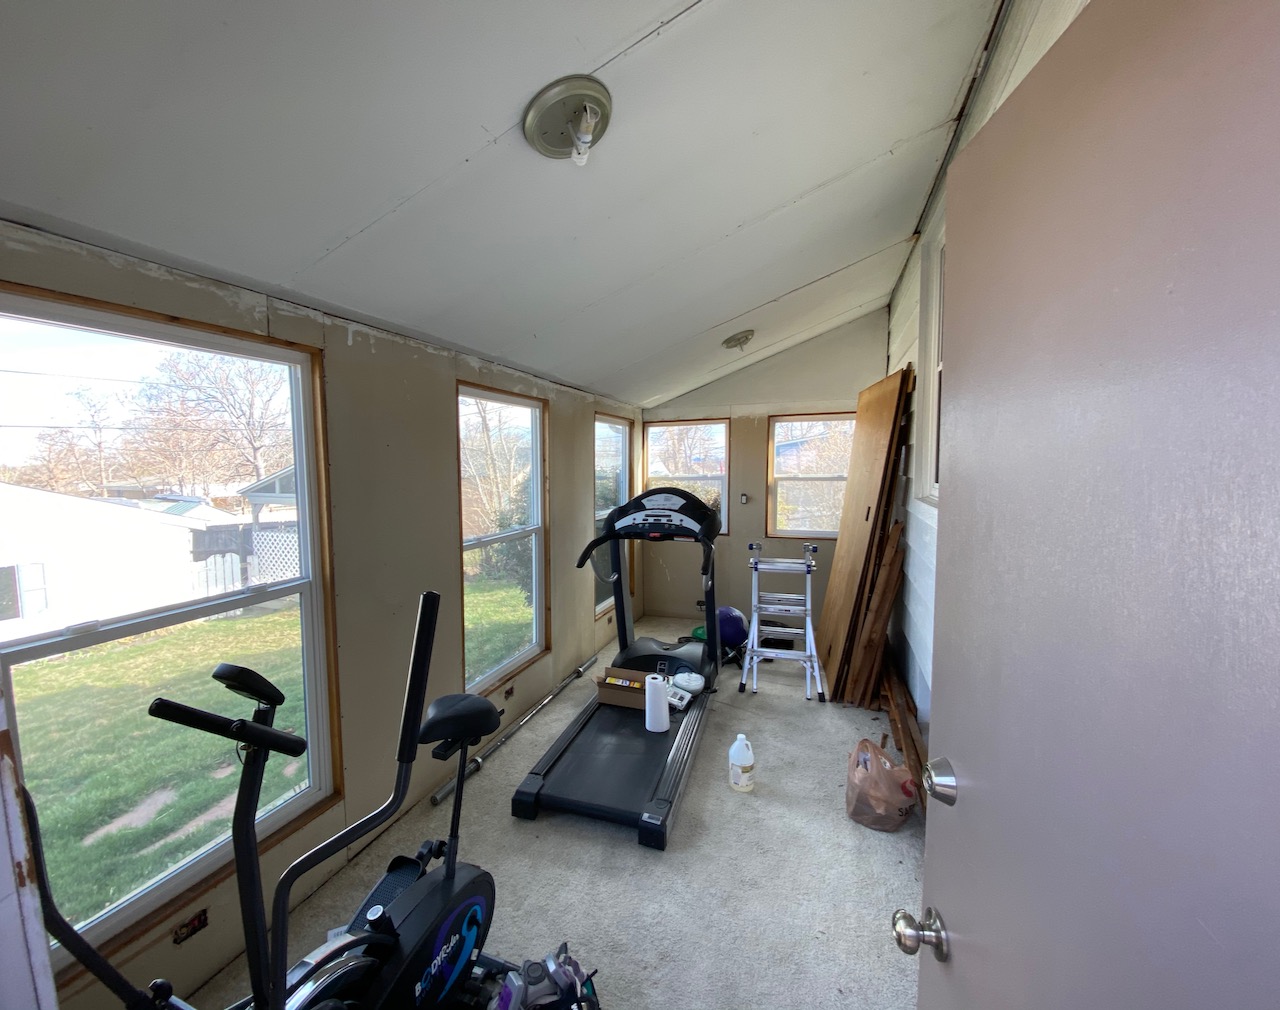


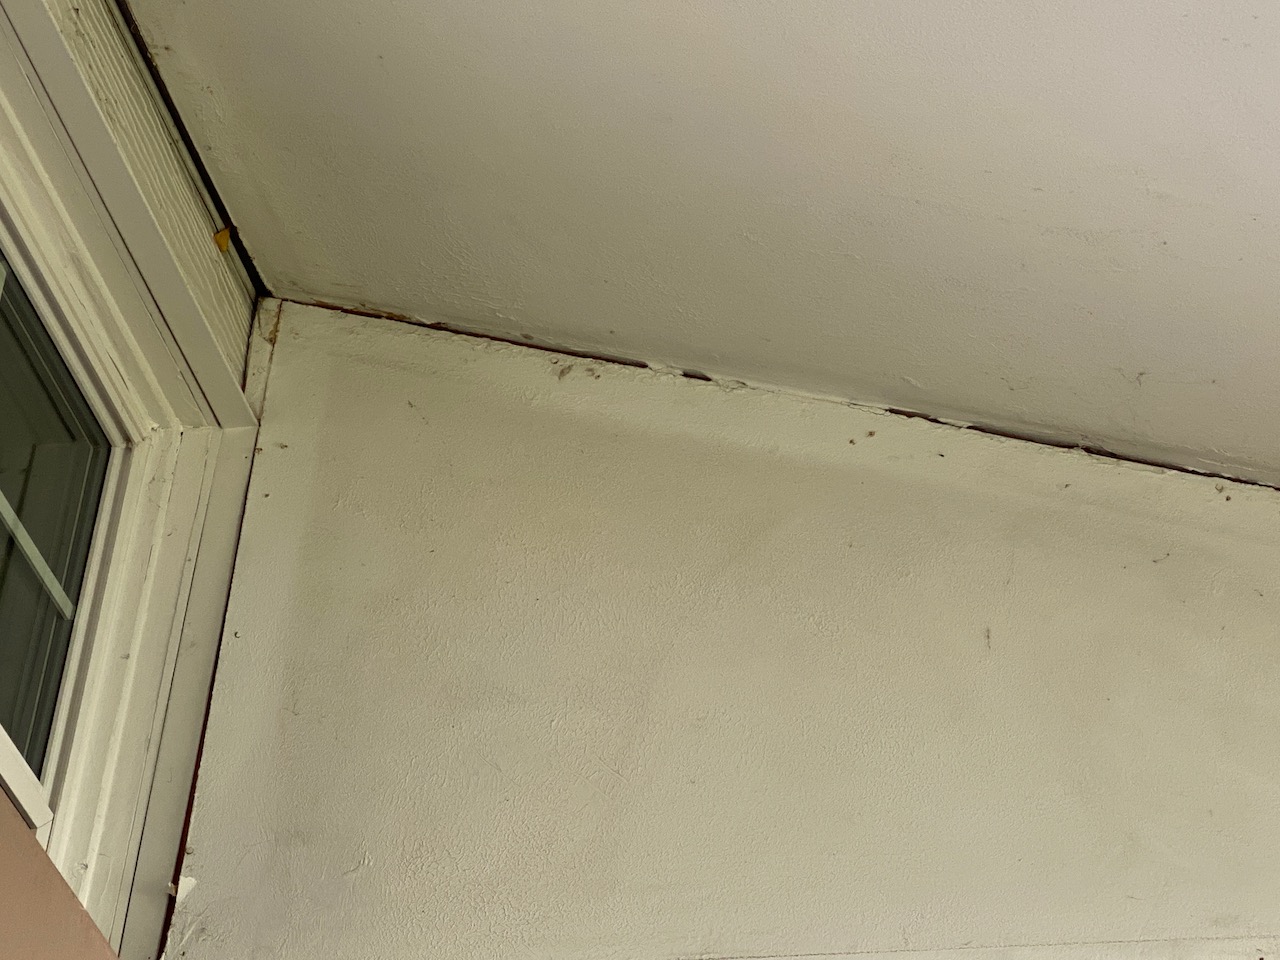
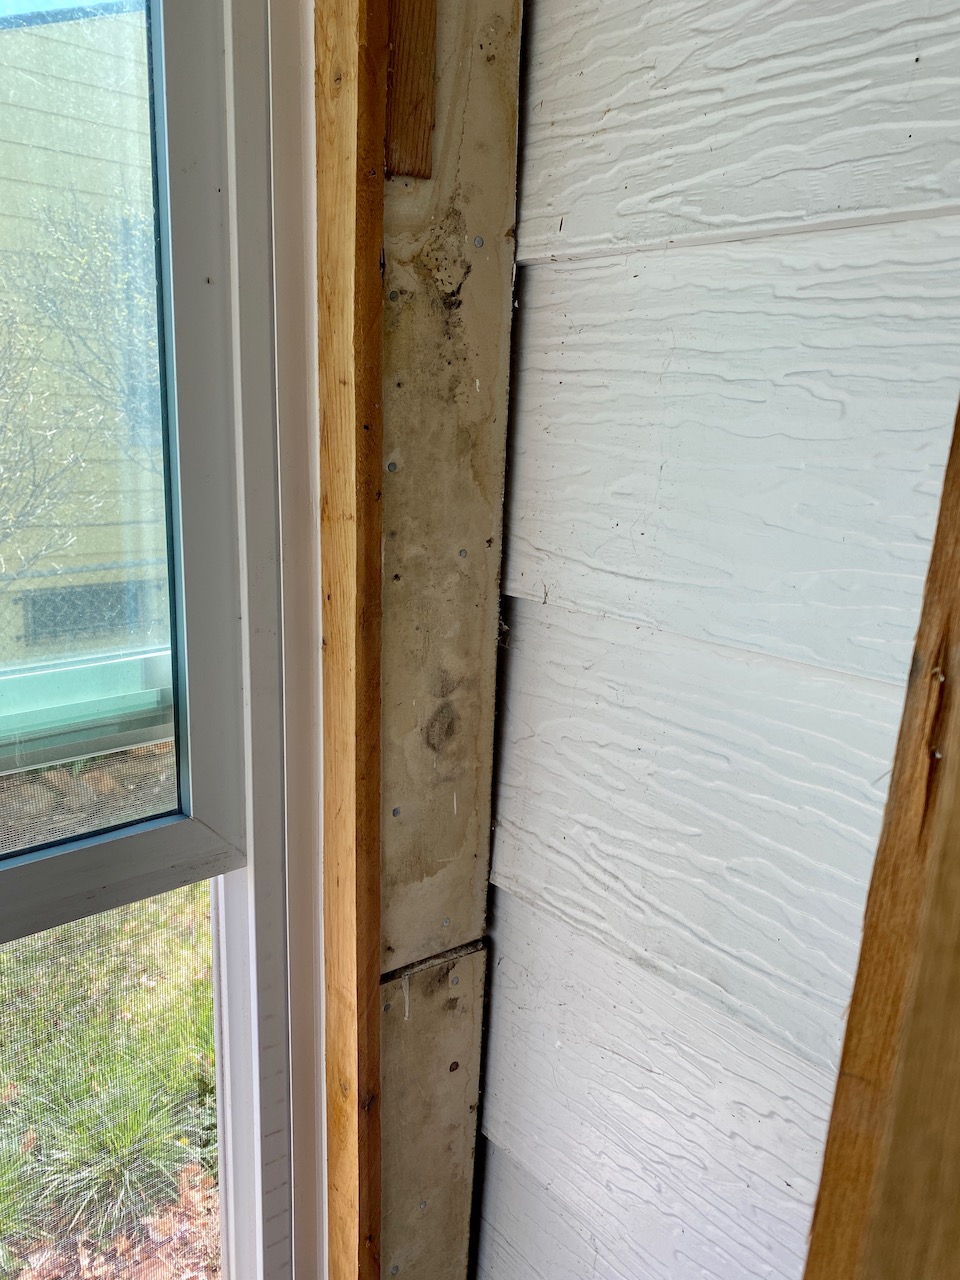
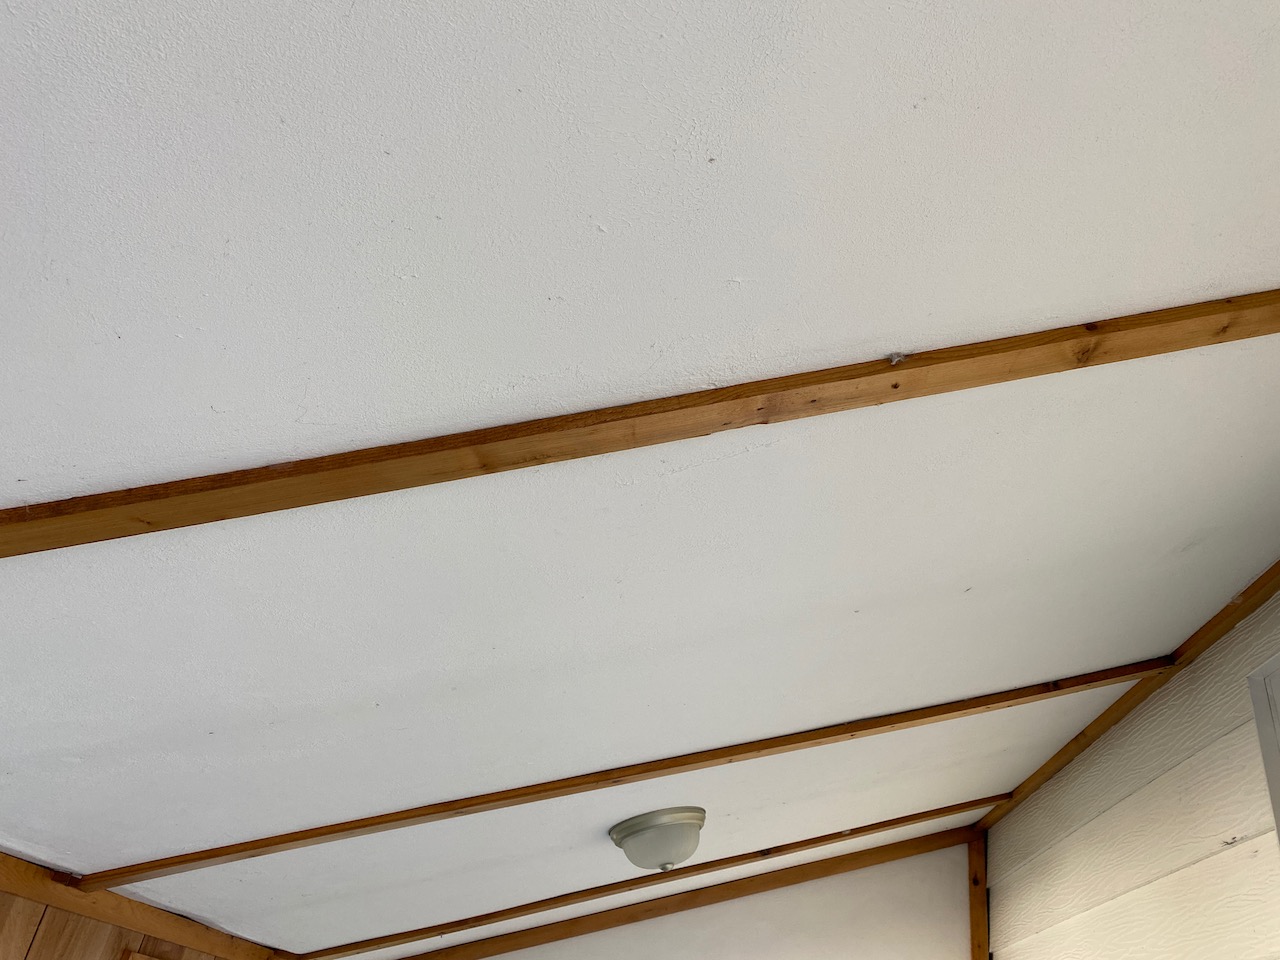
Good news (not pictured): There was sufficient insulation and a good foundation under the space. I didn’t find anything majorly problematic in the teardown but did see some mildew, light water damage, and some unsightly gaps that they’d covered up with the paneling and trim.
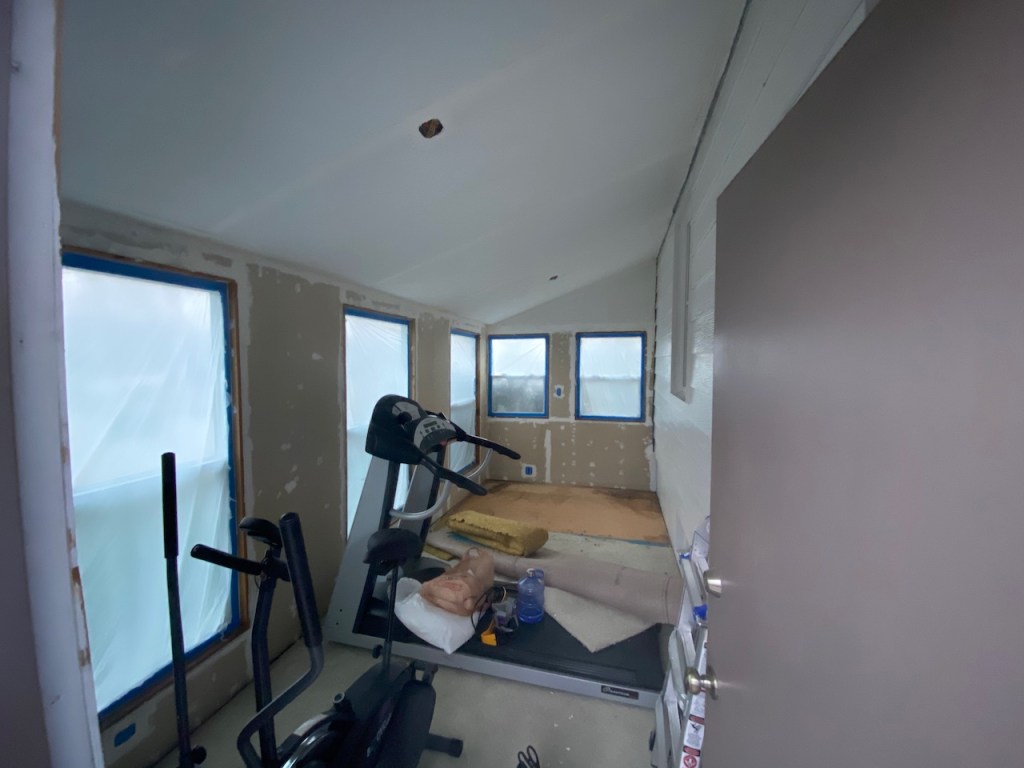
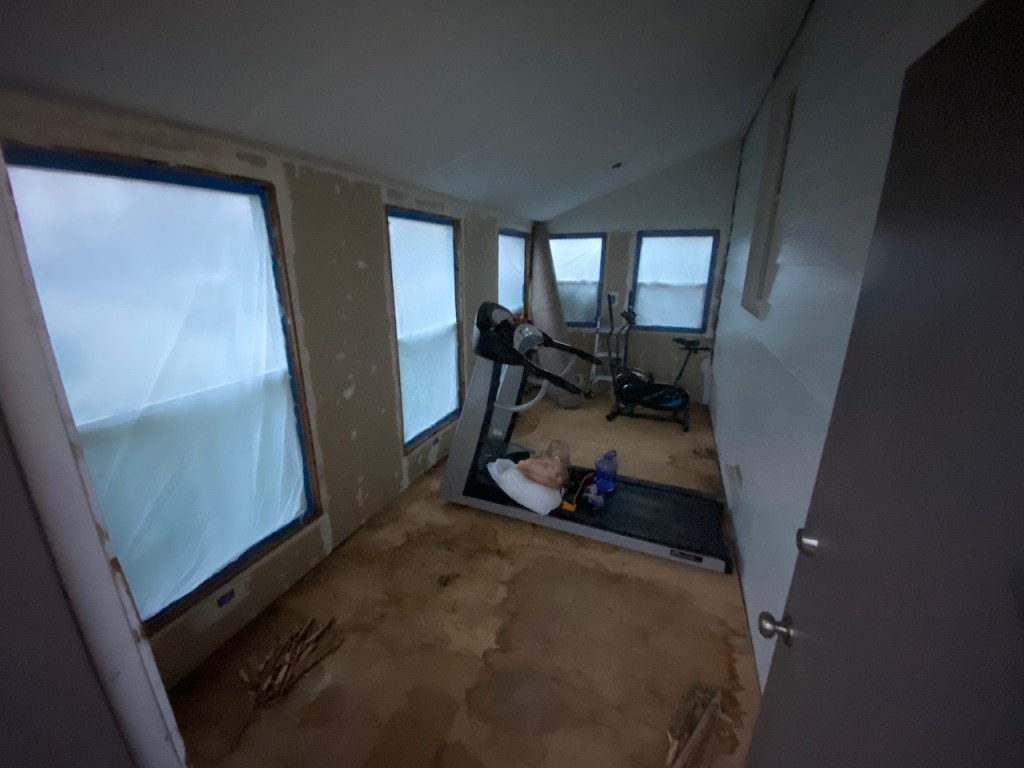
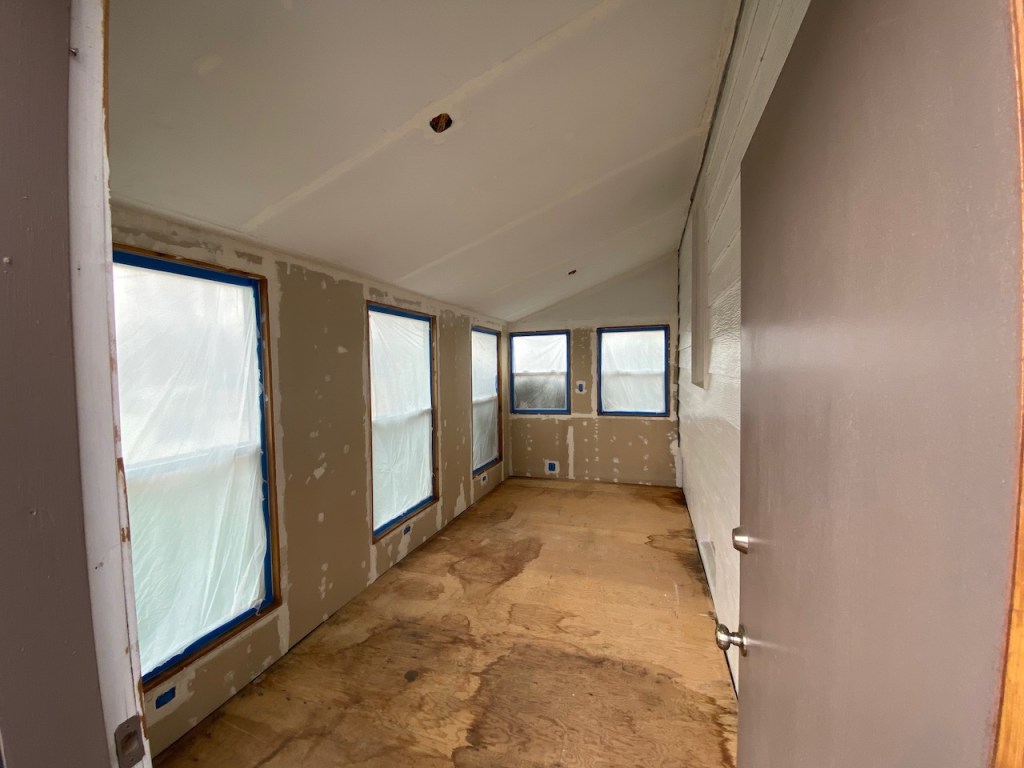
Decided to do the drywall repair and removing the carpet and under layment in parallel. Also took out the light fixtures. Making great progress. Though tearing things down is always easier than building things up, much work to be done still.
Sidebar: The History of Rome Podcast

I’d be remiss if I didn’t mention Mike Duncan’s The History of Rome podcast.
At the time of writing this, I’ve listened to over 140 episodes of this incredible podcast. I’ve learned so much and I can’t recommend it highly enough.
It will take me through finishing the nursery and bathroom re-model that are both also nearly complete.
Preparing to Build Back Up
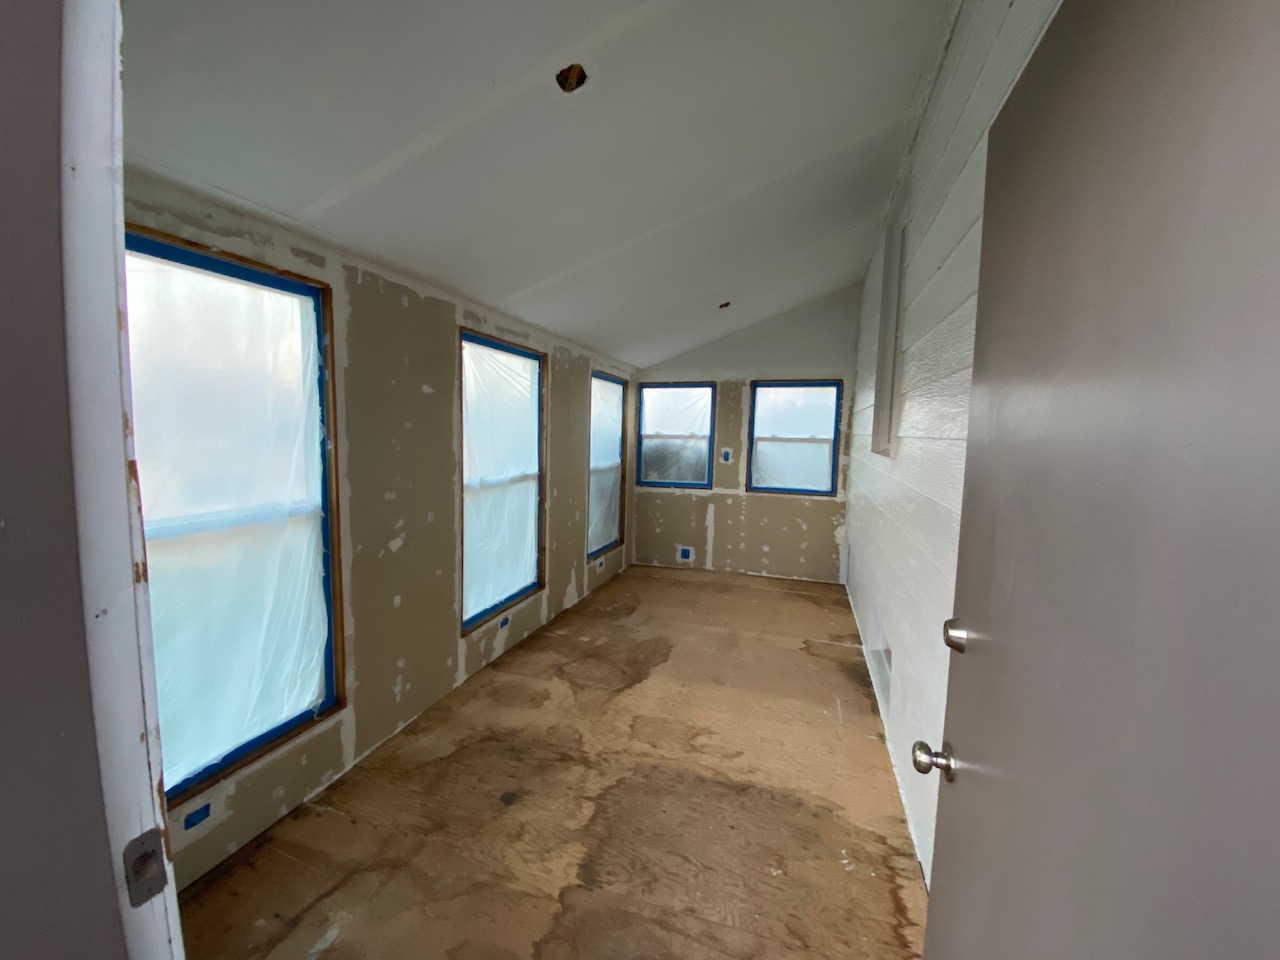
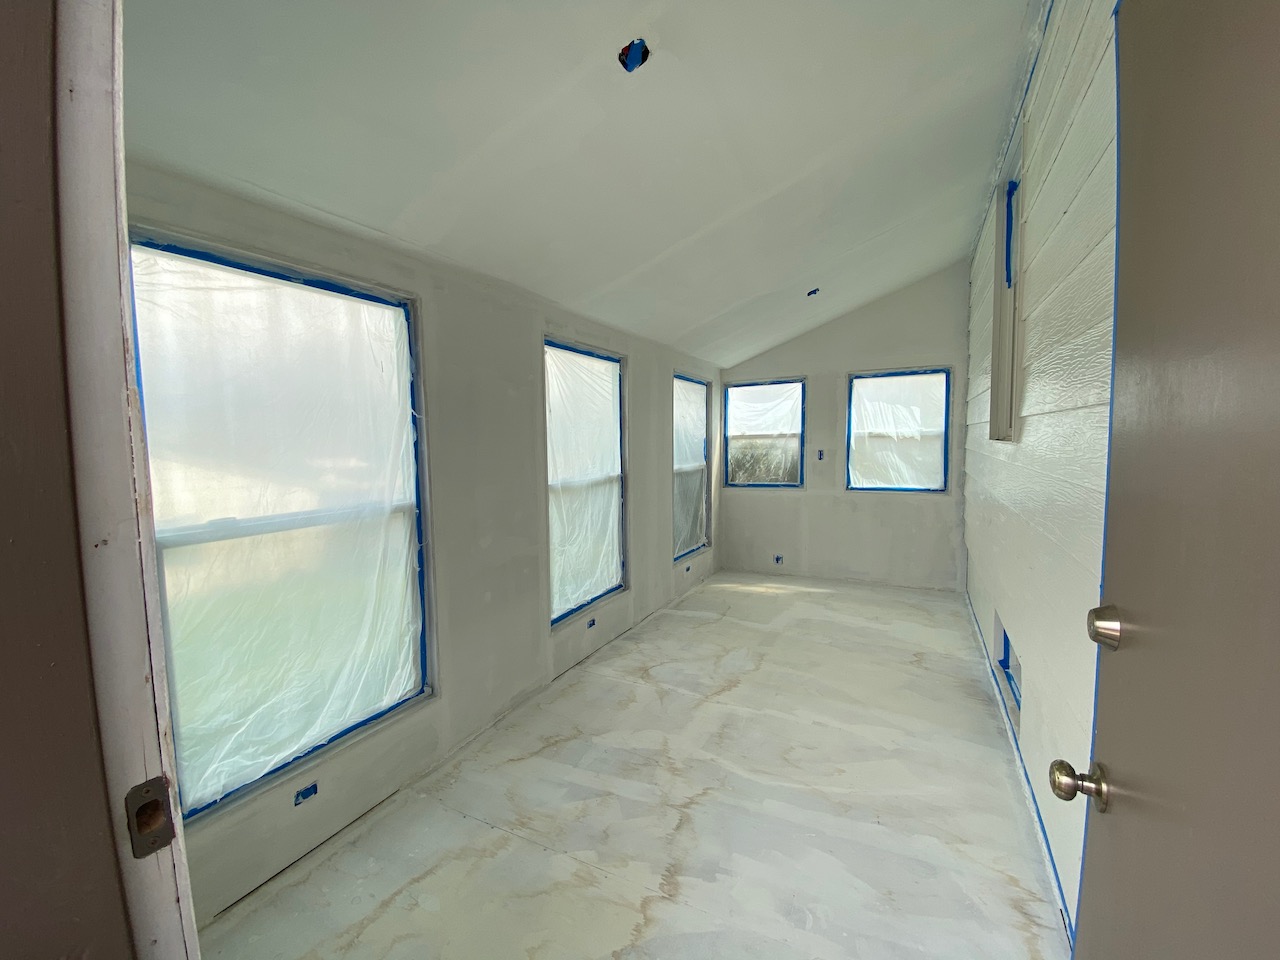
There were lots of gaps in the previous drywall work that they covered up with the treated wood trim. Gap filling foam did a wonder on those spots, which will help keep out insects and provide additional insulation. After inspecting further, it seems the water damage was from past events and was not severe enough to damage the subfloor. Hit it with a coat of primer.
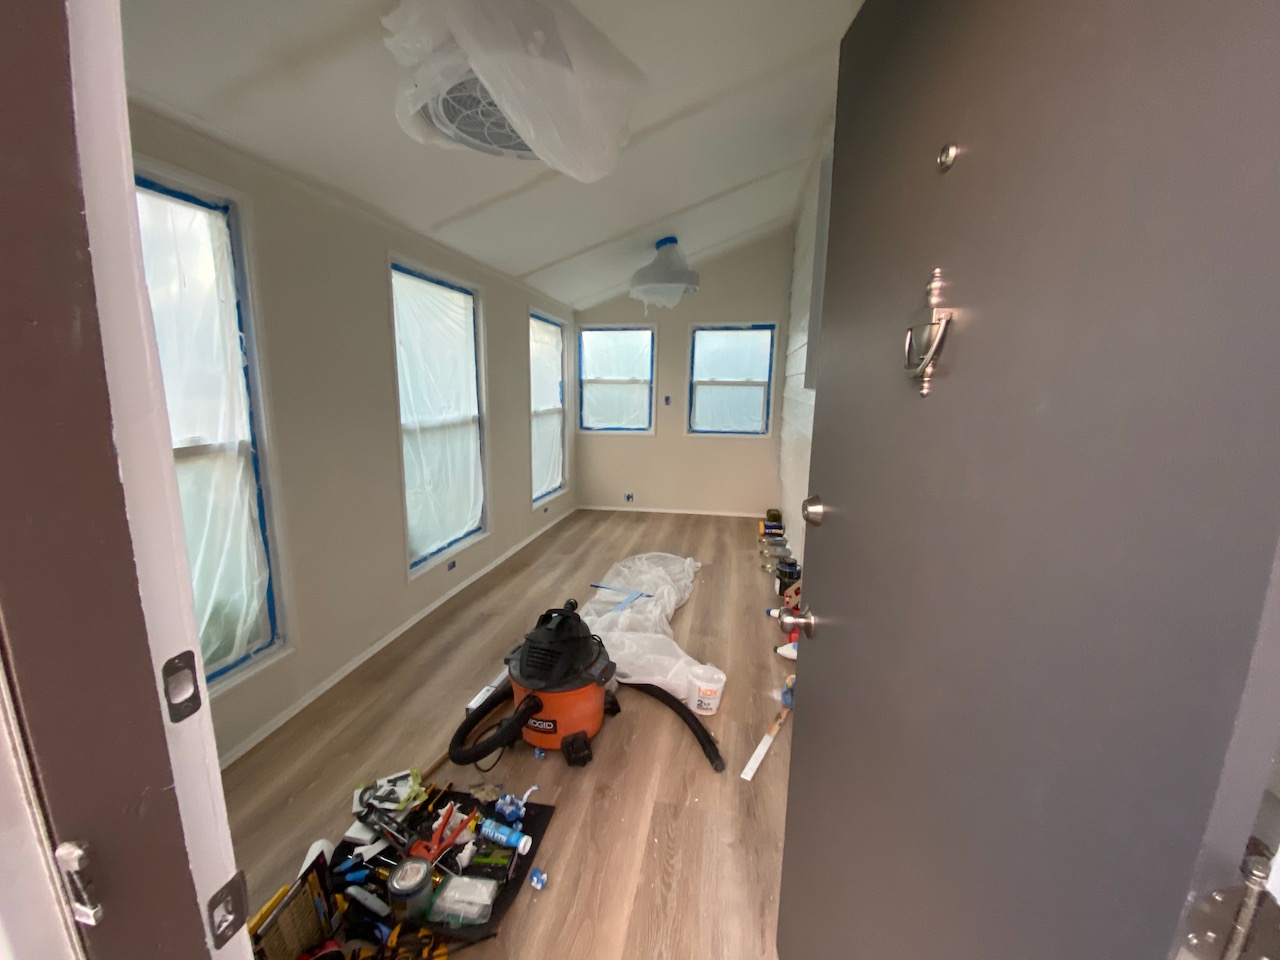
Installing the Flooring
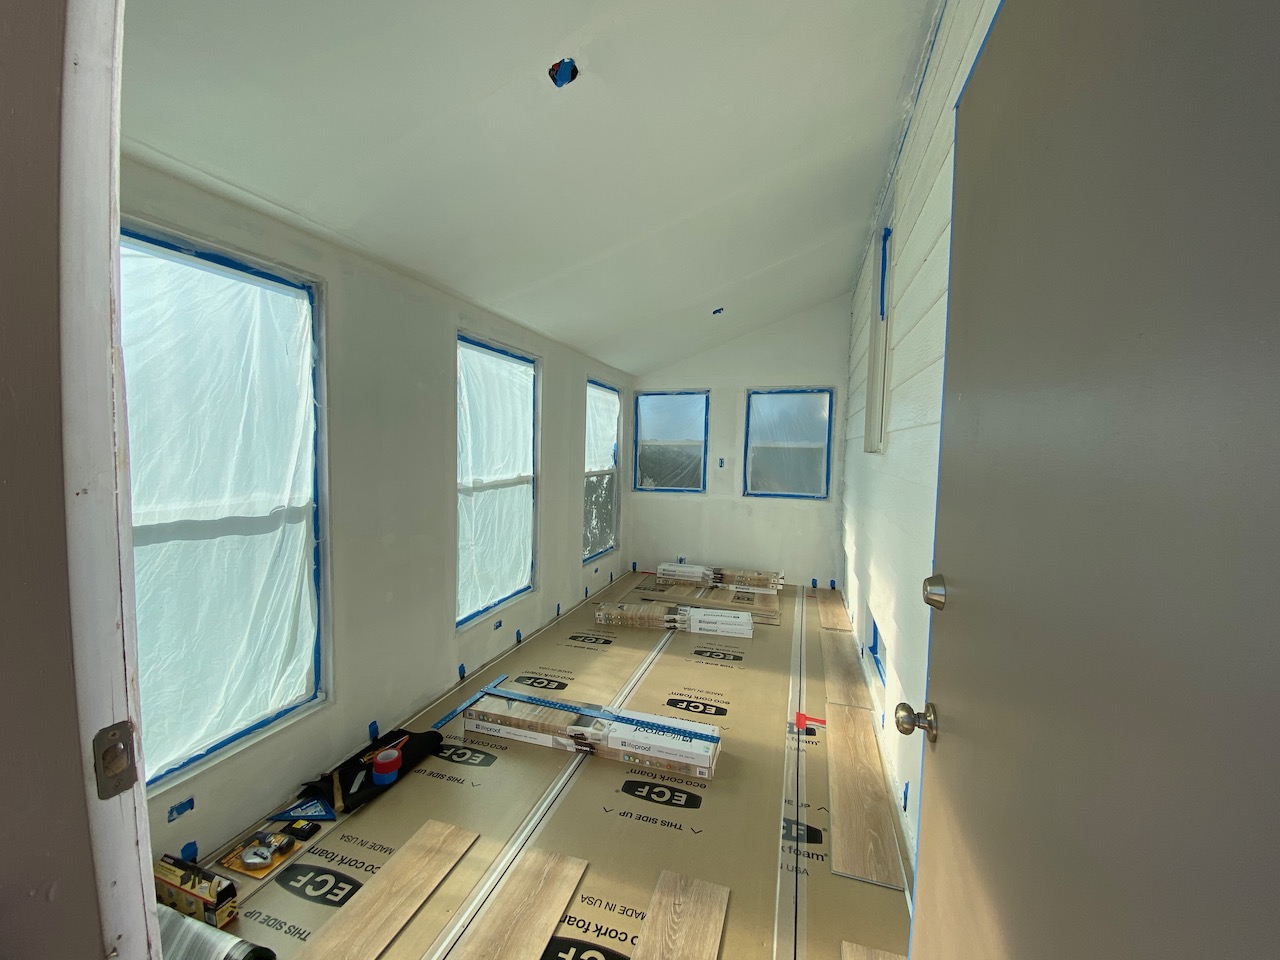


I’m using this room as an office for my business, but it could be used for any number of things. I decided to go with vinyl because of the ease of maintenance and ability to have the room be a few different things in the future.
After deciding on vinyl, I started with a cork underlayment to help with insulation, cushioning, and noise dampening.
This was a full day of work. I was exhausted at the end.
I will need to do acoustic testing, but I’m planning on recording Hello Blink Show episodes in this space. The room is not dedicated for audio, so I’m not going all-in on that use case (like with black foam). If I need to add additional furniture, curtains, or other things to help with echo later, I will cross that bridge later.
Electrical
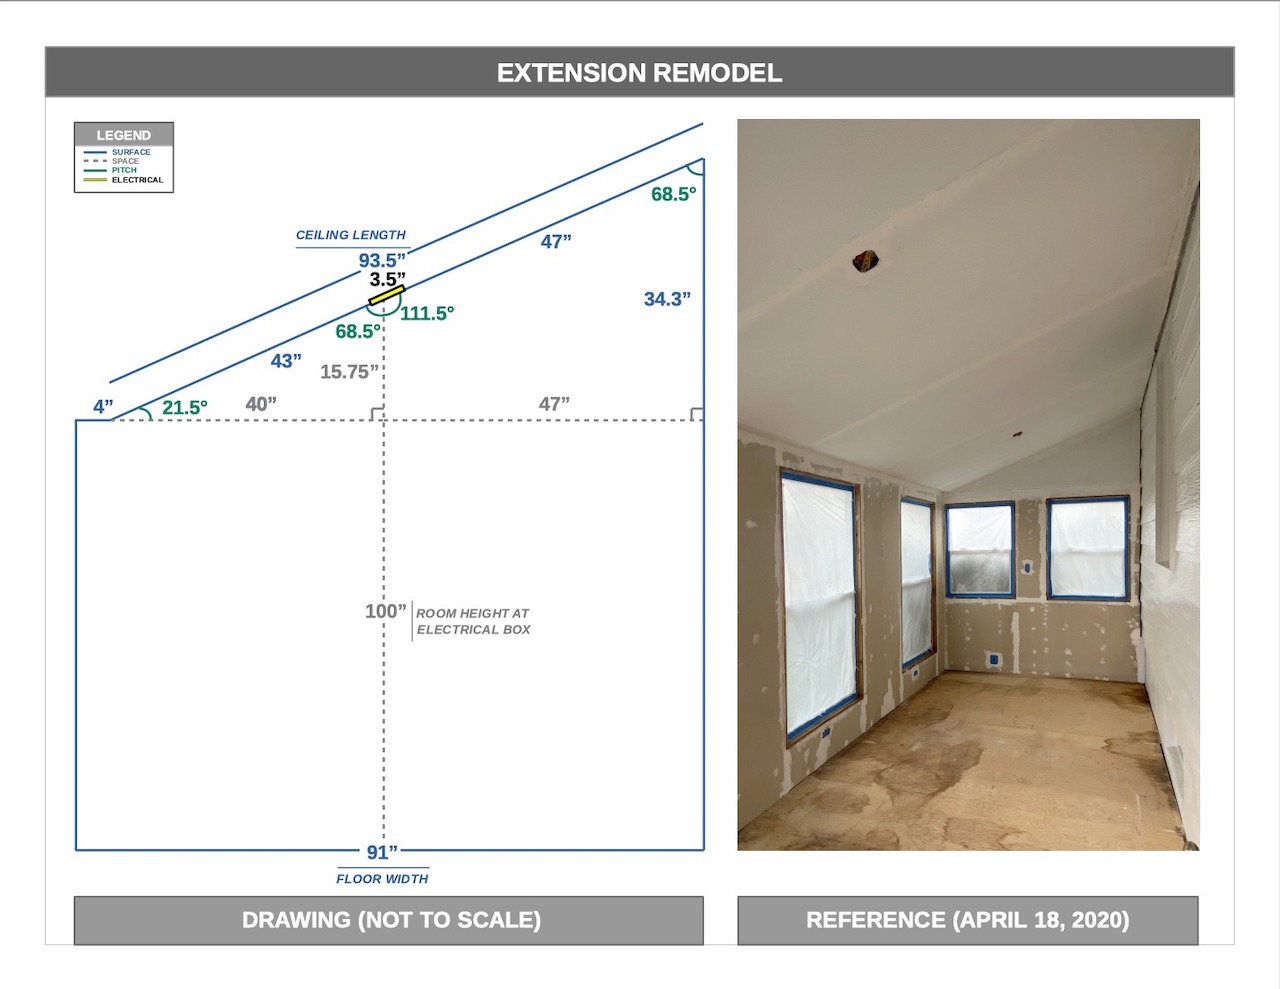
Here’s where I got a little out of hand. I wanted to make sure that the ceiling fan would work with the ceiling pitch. I rediscovered geometry and went to town. I had a licensed electrician install the fixtures and add a hardwired smoke detector (not pictured).
The fans themselves were extremely difficult to install and took more time than expected. The boxes did need to be replaced with weight bearing ones UL-graded to hold the fans up, but that didn’t take long. Installing the smoke detector was also more difficult than expected and required an insane drill bit which the electrician fortunately had in the van.
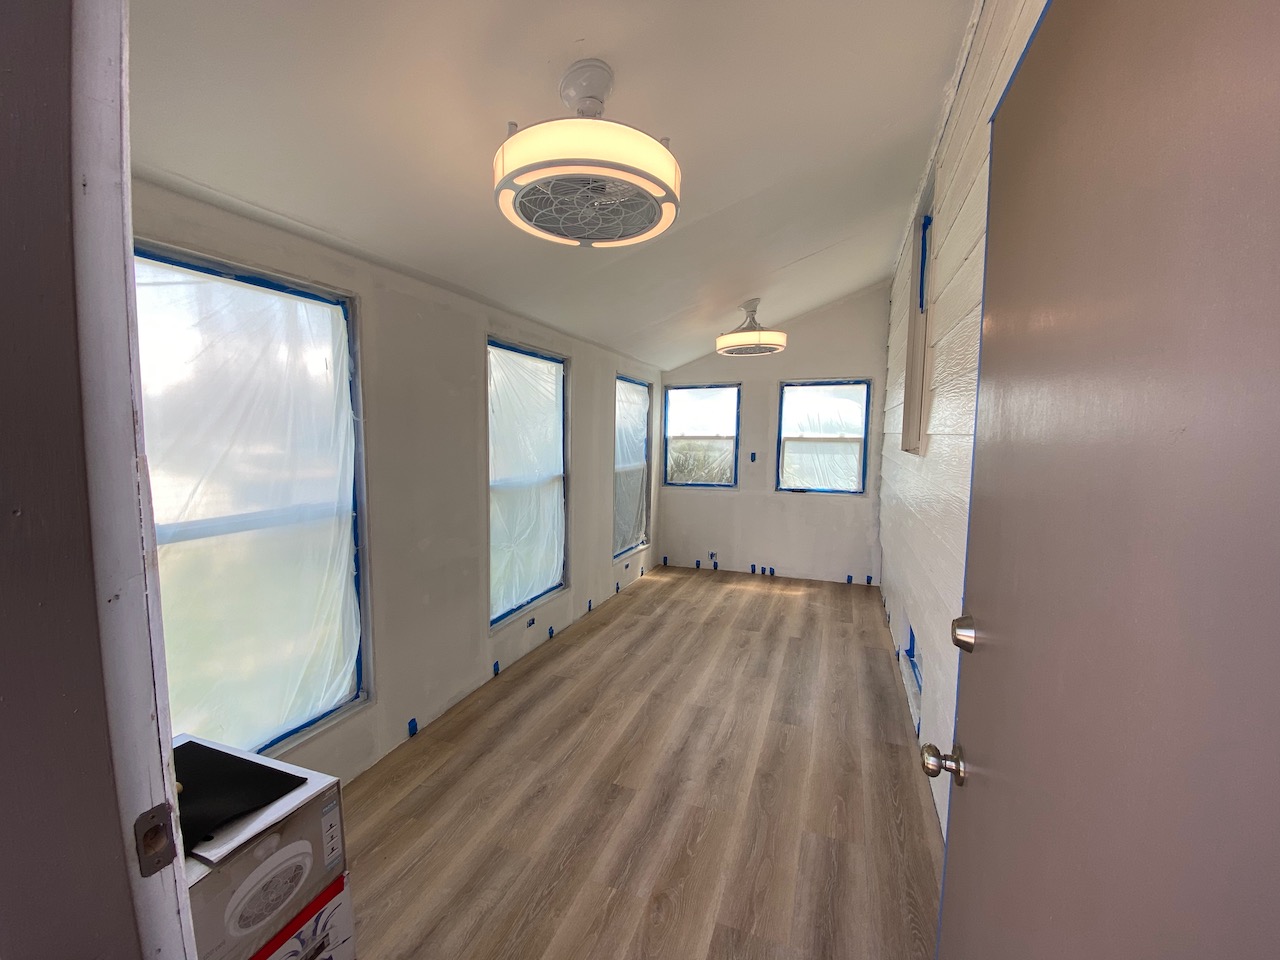
These are two-in-one fixtures with clean LED light (looks slightly yellow in the photo) and reversible caged fan for different seasons. I’m definitely satisfied with how they’re working so far.
Side Quest: Door Hardware and Signage
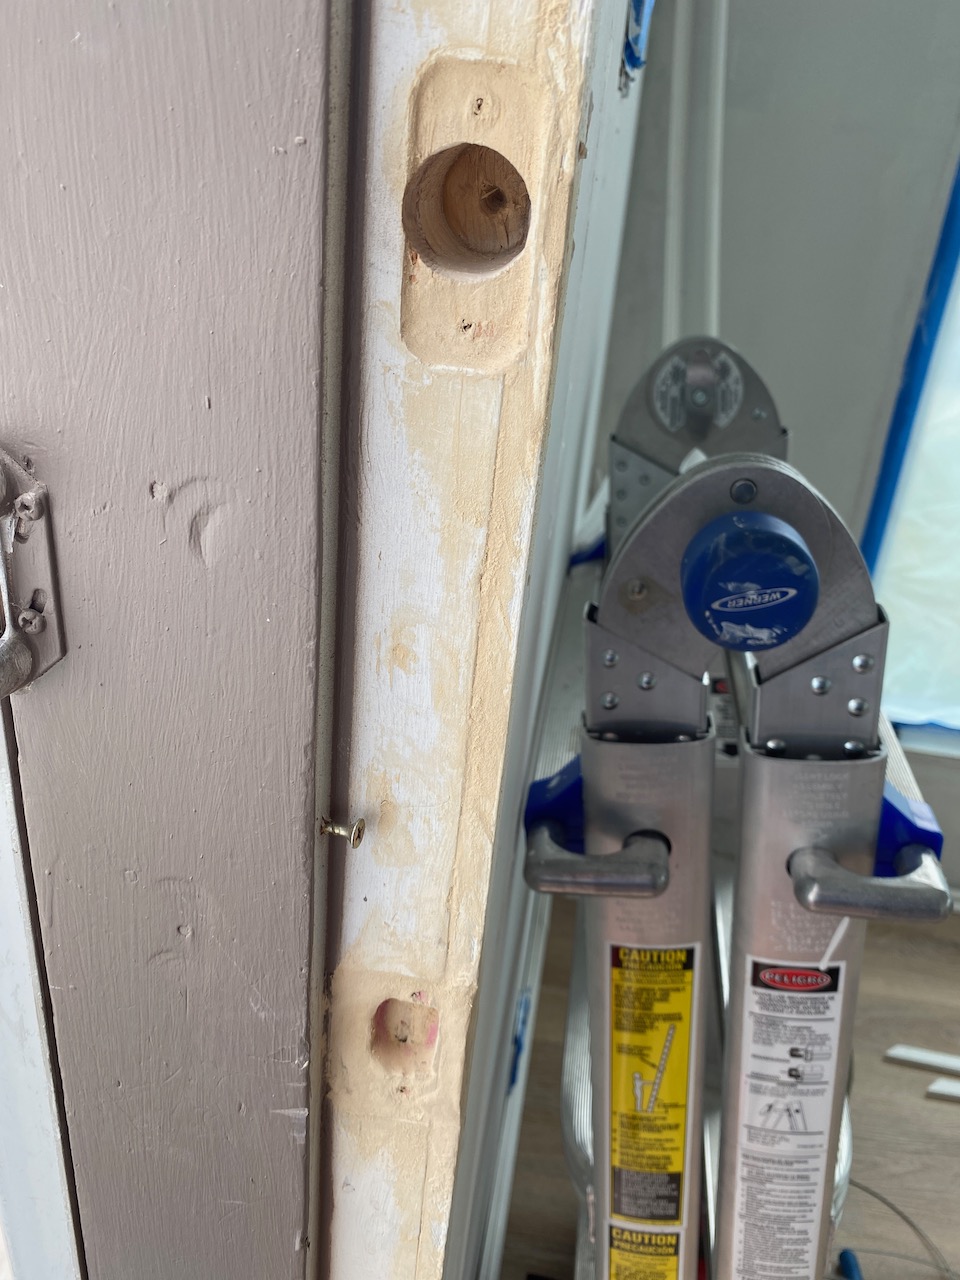

The door hardware wasn’t in good shape. The surface on the door knob was worn down, the hinges were a different finish, and there wasn’t any sort of door stop. There were also gaps in the door frame from a previously botched lock install.
None of this was strictly necessary to fix. But if you’re doing something, might as well do it right. I bought and installed new hardware to address all of these issues.
I’m planning on using this as a formal office, so I decided to have fun with it by installing an eye viewer and door knocker (pictured below). I also bought numbers for a half address that I’ll put up later. (The outside needs touching up, too.)
This was a lot harder than I expected. Doors are very sensitive and getting the alignment just right took real effort. We’ll see how it lines up when temperatures change in the winter… I’m expecting to have to revisit this.
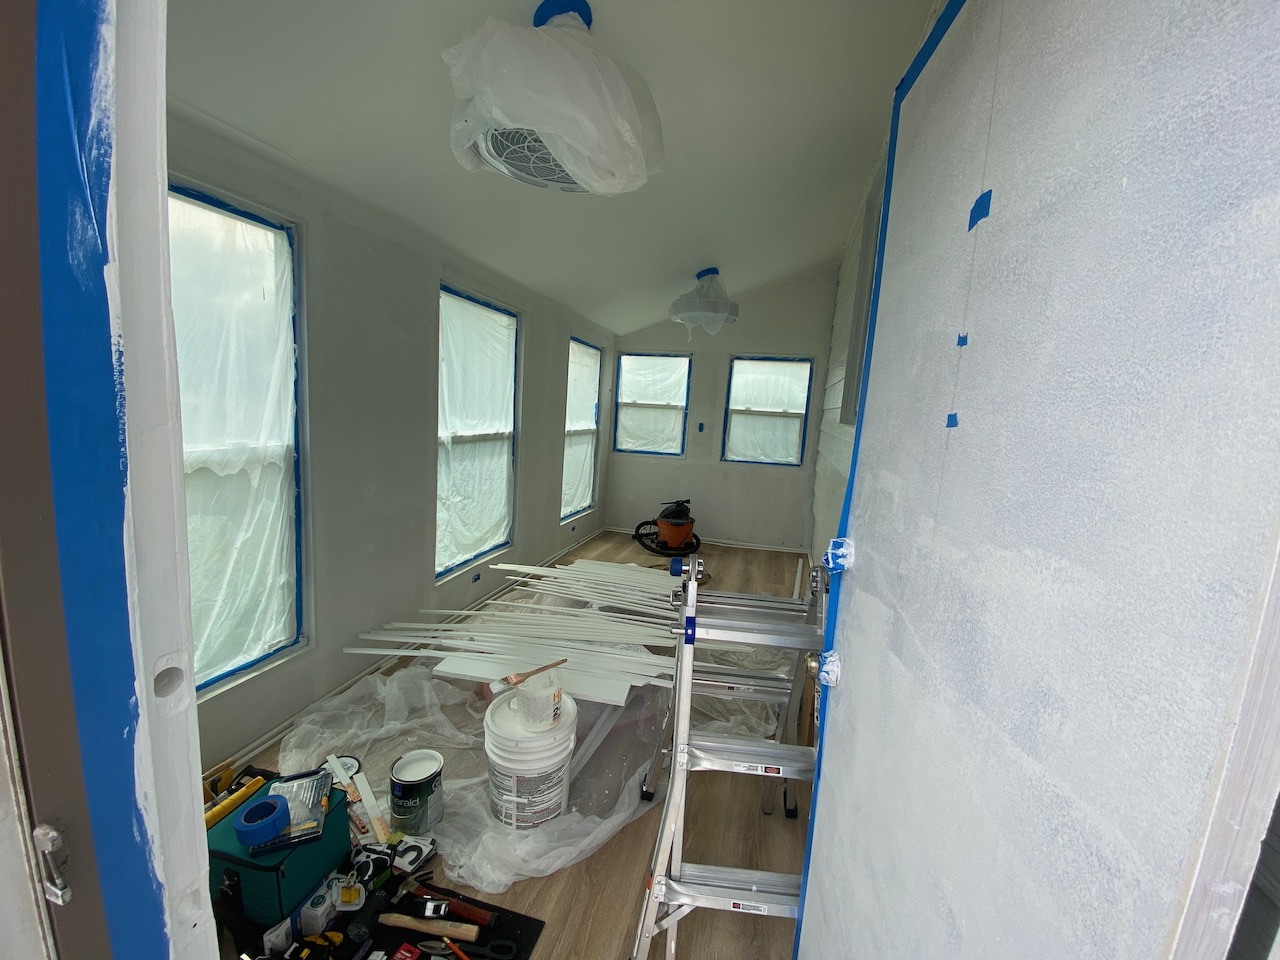
Trim, Caulk, Texture

This ended up being as difficult as I expected. Which is to say it was massively time consuming, but I love how it came out. I went with PVC trim because the room is not square, the flexibility there made it much easier to finish it without that being too obvious.
There were a number of varying dimensions I had to keep in mind when installing this, so I ended up sticking with this particular style for the entire room for consistency sake. This allowed me to account for the height of outlets, the basement window, and the door frame without having to do custom cutouts required to install a more typical trim selection. I do think the lower profile trim looks nice too.
After
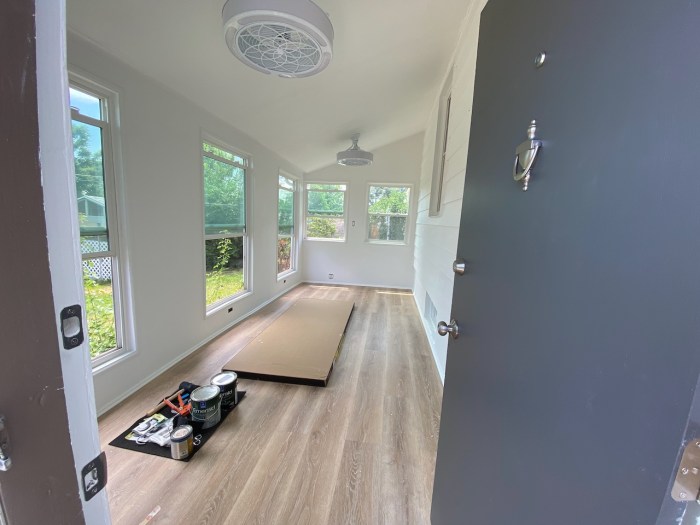
All set! (Minus the electrical outlet plates, not shown in this picture that I installed later). You can also see the new storm door, boxed and laying flat there.
I initially set a deadline to have the office, the bathroom re-model, and the nursery all done by August 1. This was done just after July 1 and the nursery will be done within the week. So it feels good to be ahead of schedule without blowing out the budget (more on that next).
Budget
| Item | Cost (↓) |
|---|---|
| Electrician Labor | $620.00 |
| Vinyl Flooring | $479.54 |
| Electrical Fixtures | $438.97 |
| Storm Door | $320.20 |
| Consumables* | $269.67 |
| PVC Trim | $211.94 |
| Hand Tools | $201.71 |
| Door Hardware & Signage | $158.73 |
| Paint | $120.83 |
| Cork Underlayment | $112.50 |
| Total | $2,934.09 |
Here are all the individual items that ended up costing over $100, ranked in Descending order of cost. Consumables include things like painter’s tape, gap filling foam, drywall tape, caulk.
One thing that’s not included in this budget is that I borrowed a nail gun and shop vac from a friend. Those, a drill, and an impact driver are the only power tools I used during this project.
I mentioned above in the Electrical section but worth re-iterating that the major driver of the electrician labor was the fact that the fans themselves were extremely difficult to install. They also had to replace the boxes to bear the weight of the fans. Installing the smoke detector was also a chore, too. Definitely glad I had a professional take care of these things.
I’m not sure what this would have cost to have done professionally. If you know, let me know! But I really enjoyed it and look forward to spending time in this re-modeled space.
Unfinished Business
Blinds: I need to do more research on which blinds, how much light they allow in, etc. and because of how much time I take researching things… I’m putting this off for now. The nursery and bathroom re-model beckon.
Heat: There is space for electrical floorboard heaters. Haven’t had those installed yet, but we do have room in the breaker if-needed as they will require having a dedicated line installed because of the power draw. I’m planning on seeing how drafty it is in the winter.
Storm Door: I bought a better storm door that will help with insulation. When that’s installed, I’ll repaint the exterior threshold. I’d also like to look into installing a rubber gasket to totally seal the door, though it’s arguably overkill since the storm door and rebuilt threshold get that job done.
Exterior: The outside of the extension needs some touch up work for sure. After that’s done, I’ll mount the “1/2” sign for our address as a fun finishing touch.
Decor: Oh yeah, I need to move in and decorate the thing. Don’t have a lot of time for that now, so will keep it basic. I may revisit this with another post when it’s fully decorated and looks how I want it to look.
Lessons Learned
- The Good
- Satisfaction of a job well done.
- Look at all that natural light!
- Grateful for people who I could ask questions along the way, especially in the beginning.
- Hard commitments. There’s a degree of inevitability when there is a baby on the way! That made sure I finished the job.
- Stores like the Home Depot, Ace Hardware, and Sherwin Williams did a great job over the last few months ensuring customer safety.
- There are many great American companies who make high quality tools and construction materials, I was proud to support as many as I could throughout this project.
- The Bad
- So. Much. Painters. Tape. Between. Steps.
- I hit a bit of a wall before installing the trim or applying the drywall texture because I’d never done either before. That was the emotional “low point” for sure.
- Electrical is expensive to get right and even more expensive to get wrong.
- Paint isn’t very forgiving. The drywall was pretty beat up. I think the foam and texture did level things up but there are some little places that are visible through the paint.
- It was a serious chore to determine the country of origin for products. I wish retailers would make that easier, and even offer a search/filter function for it.
- The Ugly
- Seriously, that wood paneling with the printed animals.
- Painting the trim before applying it was a huge pain and did not seem necessary after all. I applied the second coat after it was installed.
Special thanks to my wife for her patience after I spent so many hours out there. And thanks to our daughter-to-be. Both of them have been working much harder than me lately!
